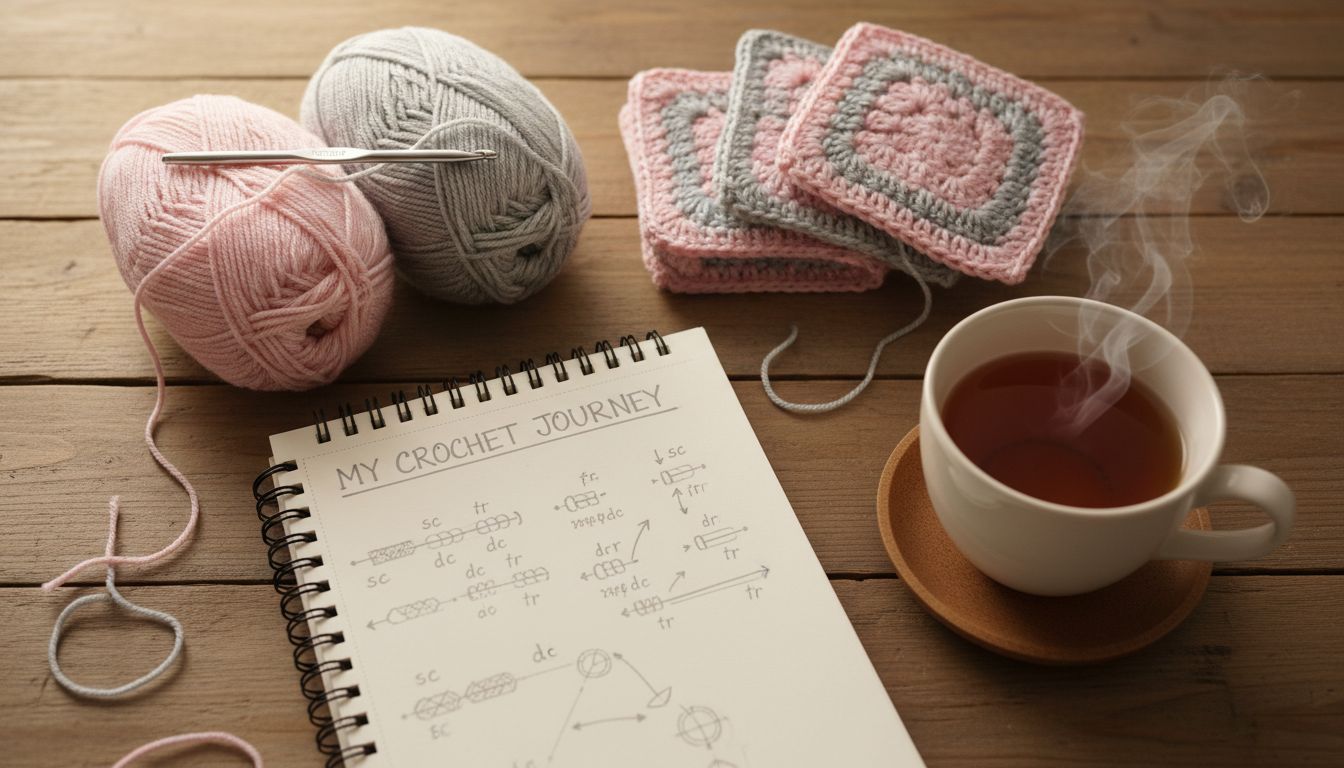
Crochet is a very addictive craft that uses a single knitting hook and a yarn that creates a fabulous effect for fabric or toys, home furnishings. You thread some yarn through other yarn to build lots of rows of stitches. With just a few basic moves, you can make scarves, blankets, toys, bags, and much more.
You do not need any experience with yarn or crafts to begin. If you can hold a pencil and count to ten, you can learn crochet. This post will walk you through the basics step by step, using simple explanations.
A Short History of Crochet
Crochet, became popular in the 1800s. Lace, trims, and clothing it was used for.
The word crochet means hook in France. Over time, crochet spread around the world. Today, people use it for many purposes.It is very addictive and meditive.
Basic Tools and Materials
You only need a few things to start:
You need a crochet hook. This is a smooth tool with a curved tip that grabs the yarn. Hooks come in different sizes. Bigger hooks make larger, looser stitches. Smaller hooks make tighter, smaller stitches.
You need yarn. Yarn is the strand of fiber you work with. It comes in many thicknesses, colors, and materials.
You may also want a pair of sharp scissors, a yarn needle (a big, blunt sewing needle for yarn), and a stitch marker (or even a safety pin) to mark places in your work. But for your very first practice rows, hook and yarn are enough.
Yarn Labels and What They Tell You
When you buy yarn, you will see a label wrapped around it. This label contains useful information.
You will see the yarn weight. This tells you how thick the yarn is. Common names include lace, fingering, sport, DK, worsted, aran, bulky, and super bulky. For beginners, worsted weight is often the easiest to see and handle.
You will see the fiber content. This might say acrylic, wool, cotton, bamboo, or a blend of fibers. Fiber type affects how the yarn feels, stretches, and washes.
You will also see suggested hook sizes. There may be a small picture of a crochet hook with a size range, like 4.5–5.5 mm or sizes G–H. This is a suggestion, not a strict rule, but it helps you choose a hook to start with.
Most labels also show washing instructions. Small icons tell you if the yarn can go in the washing machine, dryer, or if it must be hand-washed.
Crochet Hook Sizes Explained
Hooks usually have two kinds of labels: a letter (like G, H, I) and a number in millimeters (like 4.0 mm, 5.0 mm). The millimeter size indicates the hook’s diameter. This is what really matters.
For a worsted-weight yarn, a 5.0 mm or 5.5 mm hook is a good starting point. If your stitches look very tight and are hard to move on the hook, try a larger hook. If they are very loose with big gaps, try a smaller hook.
Metal hooks are smooth and fast. Plastic and resin hooks are light. Wooden and bamboo hooks feel warm in the hand and can grip slightly, which some beginners like because the yarn slides more slowly.
How to Hold the Hook and Yarn
There is no single “right” way to hold your hook and yarn. The best way is the one that feels comfortable and lets you move smoothly.
Many people hold the hook like a pencil. You grip it between your thumb and index finger, with your other fingers resting lightly. Others hold it like a knife, with your hand over the top. Try both and see what feels more natural.
With your other hand, you control the yarn. Loop the yarn around or over your fingers to keep a gentle tension. Tension just means how tight or loose the yarn is as it flows through your hand.
A simple way is to let the yarn drape over your index finger, and have the other fingers lightly hold the loose strand. You can adjust how much you curl your fingers to tighten or loosen the yarn. Your stitches should not be so tight that you struggle to insert the hook, but not so loose that they fall apart.
This will feel awkward at first. That is normal. Your hands will learn quickly with a bit of practice.
Making a Slip Knot
Most projects start with a slip knot on the hook. A slip knot tightens when you pull on the working yarn (the yarn going to the ball).
To make a slip knot, make a small loop in the yarn, with the tail end crossing over the working yarn. Reach through the loop, grab the working yarn, and pull it through to form a new loop. Put this new loop on your hook and pull both ends of yarn to snug it up, but not too tight. The loop on the hook should slide easily when you move the hook.
The Foundation Chain
Your very first row usually starts with a chain. The chain is a row of linked loops that form the base of your crochet fabric.
With the slip knot on your hook, hold the hook in your main hand and the yarn in the other. Bring the yarn over the hook from back to front. This is called “yarn over.” Now, with a gentle twist of the hook, pull that yarn through the loop that is already on the hook. You now have one new chain stitch.
Repeat this motion: yarn over, then pull the loop through. Each time you do this, you make another chain stitch. The little V shapes you see form the chain. Count them as you go if your pattern calls for a certain number.
Try to make the chains even, not too tight or too loose. If they are very tight, working into them later will be hard. It helps to relax your fingers and breathe.
Working Into the Chain
When a pattern says to work into the chain, it means you insert your hook into each chain stitch across. Usually you skip the first chain or more, depending on what stitch you will use for your first row. Those skipped chains act as a turning chain and often count as your first stitch.
You will insert the hook under the top of the chain (often under the two top strands of the V). Then you yarn over and pull up a loop to begin the stitch.
The Slip Stitch
A slip stitch is the smallest crochet stitch. It is often used to join rounds or to move across stitches without adding height.
To make a slip stitch into a chain or stitch, insert your hook into the place indicated. Yarn over and pull the yarn through both the stitch and the loop already on your hook in one motion. You now have one loop on your hook again.
Slip stitches do not add height; they just move your current loop to a new place.
The Single Crochet Stitch
Single crochet is one of the most common stitches. It creates a tight, sturdy fabric.
Start with a foundation chain. Skip the first chain from the hook. Insert your hook into the second chain from the hook. Yarn over and pull up a loop. You now have two loops on your hook. Yarn over again and pull through both loops. You have made one single crochet.
Repeat across the row. At the end of the row, you make one chain (this is a turning chain), turn your work, and begin the next row by inserting the hook into the first stitch.
The Half Double Crochet Stitch
Half double crochet is a bit taller and softer than single crochet.
Yarn over before you insert your hook. Then insert the hook into the stitch, yarn over, and pull up a loop. You now have three loops on your hook. Yarn over again and pull through all three loops at once. That is one half double crochet.
At the end of a row of half double crochet, you usually chain two as your turning chain, then turn and work into each stitch across.
The Double Crochet Stitch
Double crochet is larger and has a looser feel.
Yarn over, insert your hook into the stitch, yarn over, and pull up a loop. You now have three loops on your hook. Yarn over and pull through the first two loops. You now have two loops on the hook. Yarn over again and pull through both loops. That is one double crochet.
At the end of a row of double crochet, you usually chain three as your turning chain.
The Treble (Triple) Crochet Stitch
Treble crochet is even larger and looser.
Yarn over twice. Insert your hook into the stitch, yarn over, and pull up a loop. You now have four loops on the hook. Yarn over and pull through the first two loops. You have three loops left. Yarn over and pull through the next two loops. You now have two loops. Yarn over again and pull through those last two. That is one treble crochet.
Treble crochet makes tall lace effect stitches. The chains for treble crochet are usually chain four.
Increasing and Decreasing
Increasing means adding stitches so your fabric gets wider. The simplest way to increase is to work two stitches into the same stitch from the row below. For example, you can make two single crochets into one stitch to increase by one.
Decreasing means making fewer stitches so your fabric gets narrower. To decrease in single crochet, start a stitch in one stitch and then finish it in the next. Insert your hook into the first stitch, yarn over, pull up a loop. Do not finish the stitch yet. Insert your hook into the next stitch, yarn over, pull up another loop. You now have three loops on the hook. Yarn over and pull through all three. You have turned two stitches into one.
Working in Rows vs Rounds
When you work in rows, you go back and forth. You make a row, chain the turning chain, turn your work, and make the next row. This is used for scarves, blankets, and flat pieces.
When you work in rounds (or in the round), you go around in a circle or spiral. For a flat circle, you usually start with a small loop (like a magic ring or a few chains joined into a circle) and then work stitches around it, increasing as you go.
Sometimes, in amigurumi (crocheted toys), you work in a continuous ring without joining, and you use a stitch marker to mark the start of each ring round.
Rounds are used for hats, toys, coasters, and other circular or tube-shaped items.
Common Yarn Weights and Fibers
Yarn weight is how thick the yarn is. Some very common weights are:
Lace is very thin. They are used for delicate shawls and fine work Quite tricky to work with. it tears easily.
Double knitting is light but doesn’t break easily
Worsted is a medium-weight, so the best for beginners. It is thick enough to see stitches clearly but not too thick to be heavy to handle.
Aran and bulky are thicker, making fast projects and big stitches that look very stricking, Think chunky scarves.
Super bulky is super thick. It makes great blankets.
Choosing Yarn and Hook for Your First Projects
For a first project, a smooth, light‑colored, worsted-weight yarn is ideal. Smooth yarn (not very fuzzy or textured) makes it easier to see your stitches. A light color shows the shapes better than a very dark yarn, which can hide stitch details.
Choose a hook around 5.0 or 5.5 mm for worsted-weight yarn. Check the yarn label for its recommendations and start in that range. Do not worry about being exact. You are learning, not working to strict measurements yet.
Avoid very fancy, furry, or very dark yarn for your first attempts. Once you are comfortable with basic stitches, you can try more types.
Understanding Gauge in Simple Terms
Gauge is simply how many stitches and rows you make per inch or per 10 cm. It depends on thev size of your hook and the size of your yarn.
Patterns often list a gauge, like “16 stitches and 20 rows = 4 inches in single crochet.” This is a guideline that when you crochet a small piece with the hook and yarn, you should aim for that measurement.
The size of your stitches effect the gauge. Also how tight or loose you crochet effects the gauge.
It isn’t always important to measure gauge, unless you want something to fit to an exact size.
Starting and Finishing a Project Neatly
To start neatly, make a slip knot that is snug but not choking the hook. Keep your tension even as you make your foundation chain. If your first row looks tight and scrunched, you can try making the chain with a hook one size larger.
As you work, keep your edges straight by counting stitches at the end of each row. Make sure you do not accidentally add or skip stitches. Turning chains can be confusing at first; pay attention to whether the turning chain counts as a stitch in your pattern.
When you are done with your project, cut the yarn, leaving a tail of at least 10–15 cm. Yarn over and pull the tail all the way through the loop on your hook to fasten off. Then thread the tail onto a yarn needle and weave it back and forth through stitches on the wrong side (the back) of your work. This hides the end and helps keep it from coming loose.
Weave in the starting tail the same way. Trim any extra yarn once the tails are secure.
Blocking and Basic Care
Blocking is a way to shape and finish your crochet. It can make stitches look more even and help pieces look flatter.
For many fibers, you can do simple wet blocking. Gently wash or soak your piece in some water. Press out extra water by rolling it in a towel. Lay it flat on a clean towel, and let it dry completely.
Some fibers can be steam blocked. You lay the piece flat and hover a steam iron above it without pressing down, then gently pat it into shape. Always check the yarn label first to ensure heat isnt going to spoil your project. Make sure your iron isn’t too hot.
For care, follow the instructions on the label for your chosen yarn. Always cool wash.
Common Mistakes and How to Fix Them
A very common beginner mistake is accidentally adding or losing stitches at the edges. This can make your rows slant or form a triangle instead of a rectangle. To fix this, count your stitches every row or two. Use stitch markers to mark the first and last stitch of each row so you do not accidentally work into the turning chain unless you mean to.
Another issue is tension that is too tight. If your hands hurt and your stitches are very stiff, try to hold the yarn more loosely and relax your grip. You can also go up a hook size. If your stitches are very loose and uneven, try a slightly smaller hook and practice keeping the yarn flowing smoothly through your fingers.
Sometimes you might split the yarn with your hook, catching only part of the strand. When this happens, stop and pull the hook back out. Insert it again so you catch the full strand. Using a smooth hook and smooth yarn helps prevent this.
If you notice an error a few stitches back, you can “frog” your work. This just means pulling on the working yarn to unravel stitches back to the mistake. Then insert your hook into the last correct loop and continue. It feels annoying at first, but it is normal and part of learning.
Five Simple Project Ideas
Here are five easy project ideas you can try as a beginner. Each one lets you practice basic stitches without worrying too much about shaping.
A simple scarf. Make a long foundation chain as wide as you want the scarf to be. Then work back and forth in single crochet or half double crochet until the scarf is long enough. This is great for learning to keep your edges straight and your tension even.
Dishcloth or washcloth. Chain enough for a square, then work rows of single or half double crochet. Cotton yarn is perfect for this. Dishcloths are small, quick, and very forgiving. Even if they look a bit uneven, they will still work well.
Granny square. A classic granny square is worked in rounds from the center out, usually using double crochet clusters and chains. It is a gentle way to learn to work in rounds, and you can later join many squares to make a blanket.
Simple beanie hat. Work in rounds, starting from the top with increases in double crochet. Once it is wide enough to fit your head, keep going without increasing to make the sides. This introduces you to rounds, increases, and shaping.
Basic coaster. Make a small square or circle in single or half double crochet. Use a slightly thicker yarn or even two strands held together. Coasters are fast and let you practice working in rows or rounds without a big time commitment.
Final Thoughts
Crochet looks like a complex art when you see fancy patterns, but all of them are built from simple stitches like the ones you have just learned about. At first, your hands may feel clumsy, and your stitches may look uneven. That is completely normal.
The key is to practice a little at a time. Make small swatches, undo them, try again. Play with different stitches to see how they change the fabric’s look and feel. Over time, you will build muscle memory and confidence.
With just a hook, some yarn, and patience, you can create useful, beautiful things. Enjoy the learning process, and let each project be a step forward in your crochet journey.
About the Author
admin
This is a website that that is passionate about all things hand crafted, including hang made scarves, fishing, and gardening, scrapbooking, and even woodworking.
We have some handy advice and tips, you can read.