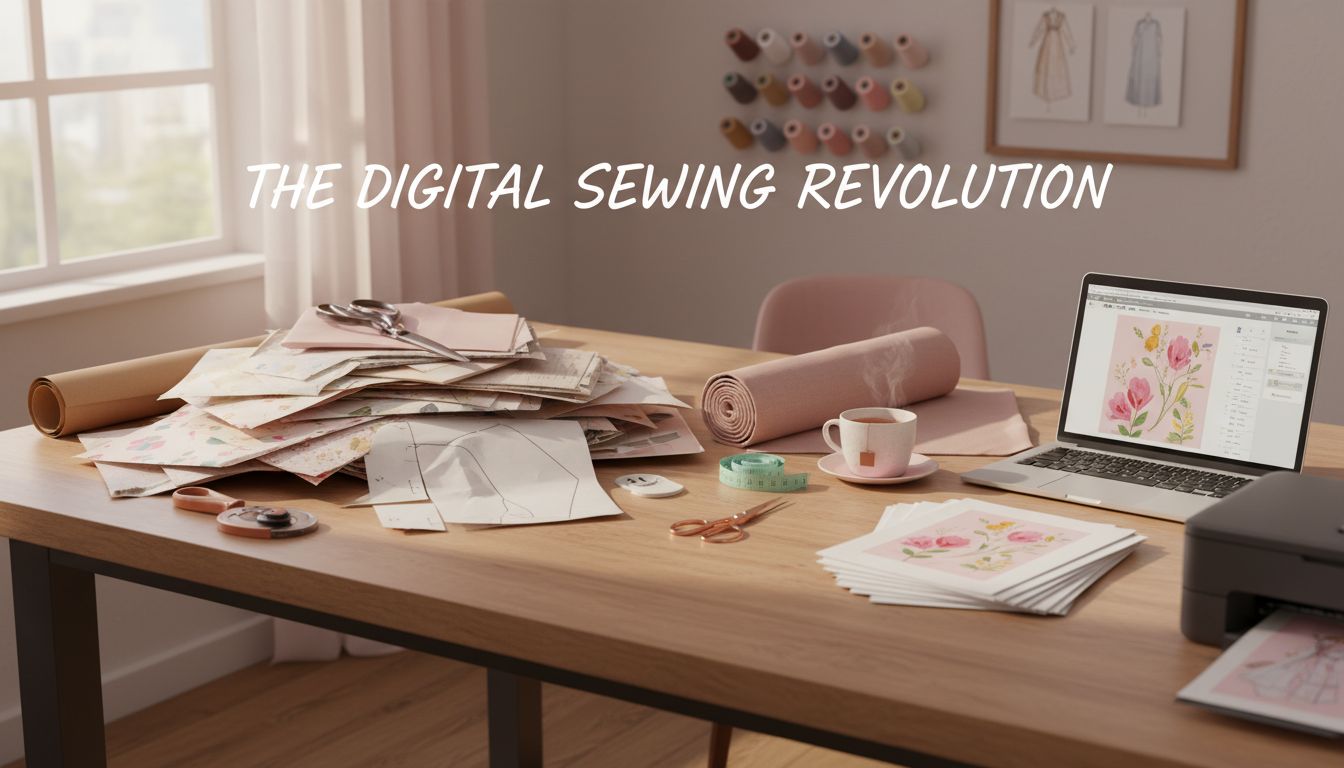
If you’ve been content with sewing with traditional shop-bought paper patterns, the world of digital sewing patterns can feel a bit mysterious—or even intimidating. Files? Printing? Layers? Projectors? It’s a lot of new processes for something that’s supposed to be a hobby where you can concentrate on jumping on your sewing machine and creating an amazing dress.
The good news is that digital patterns are designed to make your sewing life easier, not harder. Once you get past the first “how do I…?” questions, you may find they open up huge new possibilities for what, when, and how you sew.
The basic difference is that a shop bought pattern, once used is either traced out or cut out to your size, it either gets lost or very crumpled once it is used.
The digital pattern lasts forever, it is always on that download file.
There is no need to trace the pattern really, as you can download and print the pattern one hundred times if required.No need to worry about the pattern getting lost or torn.
This article shows you what digital patterns are, why you might love them, and exactly how to go from “click to purchase” to finished garment. You’ll also get practical tips to make the transition from traditional paper patterns as smooth and hassle-free as possible.
What Are Digital Sewing Patterns?
A digital sewing pattern is simply a sewing pattern you buy and receive as an electronic file rather than a physical piece of paper. Instead of walking out of a shop with a folded tissue pattern and printed instructions, you download PDFs (and sometimes other file types) to your computer, tablet, or phone.
Inside the download you’ll generally find:
Pattern pieces in various formats (for home printing, copy shop, or projector use).
An instruction booklet, usually as a PDF, with diagrams or photos.
Sometimes extra guides for measuring, fitting, and hacking the pattern.
You can then print the pattern pieces yourself, send them to a print shop, or project them directly onto fabric, depending on your setup and preferences.
The Main Digital Pattern File Types
Most pattern designers will give you a combination of these formats. Understanding the basics will help you choose what works best for your space and equipment.
1. A4 / US Letter “Print at Home” Files
These are PDFs designed to print on a standard home printer using A4 or US Letter paper.
You’ll see the pattern tiled across many small pages, each with markings (like diamonds, letters, or numbers) that help you line them up and tape them together into a full-size pattern sheet.
You’ll typically use this option if:
You don’t have easy access to a copy shop or large-format printer.
You’re comfortable with a bit of cutting, taping, and assembling.
You want a low-cost, immediate way to start.
2. A0 Copy Shop Files
These PDFs are meant to be printed on large paper (often called A0, but sometimes other similar large sizes). They look like the big tissue sheets you get in traditional patterns—only on sturdier paper.
You’ll typically use this option if:
You have a local print shop, or you’re happy to use an online pattern printing service.
You’d rather pay a bit for printing and skip the taping.
You prefer working with a single large sheet rather than many small ones.
3. Projector Files
Projector files are formatted for use with a ceiling-mounted or table-mounted projector that shines the pattern directly onto your fabric. You cut the fabric by following the projected lines—no paper pattern pieces required at all.
Projector files usually:
Have stronger, high-contrast lines.
Are arranged with minimal overlapping pieces.
Include a calibration square to help you adjust scale.
You’ll use projector files if:
You’re comfortable with a bit of technology and setup.
You want to skip both printing and paper cutting.
You like the idea of printing nothing and cutting directly on the fabric.
Why Use Digital Sewing Patterns?
If you’re used to buying paper patterns in a shop, the idea of bringing a computer or printer into the mix might sound unnecessary. But digital patterns have some real advantages, especially once you sew a lot or like to customize what you make.
Instant Access and No Shipping Delays
When you buy a digital pattern, you get it almost instantly. You don’t need to wait for a package to arrive, or find time to get to a sewing shop during opening hours. If inspiration strikes at 9 p.m. on a Friday, you can download your pattern, print it, and be cutting out fabric an hour later.
For those who live far from sewing shops or in regions with fewer pattern options on the shelf, digital patterns open up the entire world of independent designers.
Reprintability and Longevity
One of the biggest joys of digital patterns is that you can reprint them as many times as you like within the designer’s license terms, which usually allows any personal use only, as long as your’e not reprinting and selling, you should be fine
That means:
You can try different sizes without worrying about “using up” the tissue.
If your body changes, you can reprint in a new size.
If a piece gets damaged, lost, or scribbled on, you just print it again.
You’re no longer confused choosing one size to cut from a multi-size tissue pattern. Digital patterns feel much more forgiving and flexible.
Customization and Pattern “Hacking”
Digital files tend to come with:
Different size layers you can turn on or off.
Clear line styles and colors for each size.
Extra pieces for different views, lengths, or details.
Many designers also release add-on packs and free hacks that slot neatly into the original pattern. It becomes easier to mix and match features, grade between sizes, or modify lengths when everything is clean and reprintable.
Because you’re working with a file, you can even print only the sizes you need (if the file has layers), or trace just the relevant parts from a clear, crisp printout.
Easier Storage and Less Clutter
If you’ve ever had a drawer (or five) stuffed with crinkled envelopes and fragile tissue sheets, you’ll appreciate how tidy digital patterns are.
The bulk of your “pattern collection” now lives on your computer, external drive, or cloud storage. Physically, you’ll only need to store:
Printed or copied pattern pieces for the projects you use often.
Any traced or altered versions you want to keep.
You can file those in a single box, folder system, or hanging file setup without drowning in paper. And if you lose a piece, the original file is still there.
Community Support and Tutorials
Many digital pattern designers are very active online. It’s common to see:
Sew-alongs on blogs or YouTube.
Facebook groups or forums dedicated to their patterns.
Hashtags on Instagram and community posts showing real-life makes.
Detailed, photo-rich instructions designed with beginners in mind.
If you get stuck, you can often search the designer’s name and pattern name and find someone who’s made it before, explained a tricky step, or shared a fitting tip.
Sustainability and Size Inclusivity
Digital patterns can be more sustainable in a few ways:
No shipping materials, needed to deliver your pattern.
No excess stock going left.
You control how and when you print, and what grade of paper you use.
They also tend to be at the forefront of size inclusivity. Many independent digital designers offer extended size ranges, use more modern sizing blocks, and show their patterns on diverse body types. That makes it easier to find patterns that work for your body without extensive redrafting.
Potential Downsides (and How to Overcome Them)
Digital patterns are not perfect, and it’s helpful to be honest about the challenges you might encounter. The good news is that most have simple solutions.
Challenge 1: Printing at Home Can Feel Tedious
If you’re printing 60 pages on a home printer, trimming and taping them together, it can feel like a lot of work before you ever touch your fabric.
How to manage it:
Start with smaller projects like tops, children’s clothes, or accessories to get used to the process.
Use a paper cutter or guillotine if you have one; it’s faster than scissors for trimming margins.
Put on a podcast or show while you tape. Treat it as a relaxing, low-brain task.
Consider copy shop printing for bigger patterns once you know you love them.
You don’t need to do everything at once, either. You can print and assemble one pattern one evening, then cut fabric the next day.
Challenge 2: Tech Fears and File Management
If you don’t feel especially tech savvy the idea of downloading, saving, and opening files in the right program can feel exhausting to you.
How to manage it:
Create one main “Sewing Patterns” folder on your computer, with subfolders by designer or garment type. Keep it simple and consistent.
Always download and save before opening—don’t rely on the link in your email as permanent storage.
Use a free PDF reader like Adobe Acrobat Reader or a similar program that can handle PDF layers.
If your internet connection is slow or unreliable, download when it’s most stable, and back up patterns to a USB drive or external hard drive.
You don’t need advanced tech skills—just a comfortable, repeatable routine.
Challenge 3: Understanding Layers and Scaling
Many digital patterns use features that you don’t see in traditional tissue patterns, like layers and scaling at 100%.
How to manage it:
Always read the designer’s printing instructions before you start. They’ll usually be very specific and step-by-step.
Print the page with the test square first. Measure the square with a ruler. If it’s not the right size, adjust print settings before printing the whole pattern.
If the pattern uses layers, look for the layers icon in your PDF reader. Toggle off sizes you don’t need to make lines easier to read.
After you’ve done this once or twice, it quickly becomes second nature.
Challenge 4: Fear of Getting It Wrong
Any new method can feel stressful because you’re not yet sure if you’re “doing it right.” With digital patterns, common worries include:
“What if I delete the file?”
“What if I print wrong and waste paper?”
“What if I can’t find it again?”
How to manage it:
Back up your patterns in at least one additional place (cloud, external drive, or USB stick).
Most designers or shops will let you re-download patterns from your account if you lose your original file.
You’re allowed to make mistakes. A few wasted sheets of paper at the beginning are a learning cost that quickly pays off in confidence and convenience.
Step-by-Step: Using a Digital Pattern from Purchase to Finished Garment
Let’s walk through the whole process so you can see what it really looks like, from choosing your pattern to sewing the final seam.
1. Choosing Your Pattern
Start as you usually would:
Think about what you want to make: a dress, trousers, a shirt, loungewear, etc.
Look for a pattern that suits your skill level and your style.
When you’re choosing a digital pattern, also check:
Size range: Make sure your measurements fall within the range, or that you’re comfortable grading between sizes.
Fabric recommendations: Do you have something suitable, or can you get it?
Reviews or community makes: Seeing what others have made can reassure you and give ideas.
Once you’re happy, purchase the digital version and wait for the email or on-screen link with your downloads.
2. Downloading and Saving the Files
When you receive the link:
Click to download each file: usually a print-at-home file, a copy shop file, projector file (if offered), and the instruction booklet.
Save them immediately to your sewing folder. Give them clear file names if they don’t already have them, for example: “DesignerName_PatternName_A4_PrintAtHome.pdf”.
Avoid opening and printing directly from the browser if possible. Save first, then open from your computer. This helps ensure you always know where your file lives.
3. Reading the Instructions First
Before you touch the printer, open the instruction booklet. Designers put a lot of information here to save you headaches later.
Look for:
Printer settings instructions (e.g., print at 100% or “actual size,” no scaling).
Which pages to print for which sizes or pattern views.
How to assemble the pages (there is often a layout diagram).
Size charts and finished garment measurements.
Any special notions or prep work you’ll need.
Think of this as the “map” for the journey—worth a few minutes upfront.
4. Checking Size Charts and Choosing Your Size
Just as you would with a traditional pattern:
Measure your bust, waist, and hips (and any other key areas, like bicep or thigh, depending on the garment).
Compare your measurements to the size chart in the instructions.
Note where you fall across the size range. It’s very common to be one size at the bust and another at the hips.
Digital patterns sometimes include layering, meaning you can display only the sizes you want before printing. If the instructions mention layers:
Open the print-at-home file in a PDF reader that supports layers.
Click the layers icon and uncheck the sizes you don’t need, leaving only the ones that match your measurements (often two or three adjacent sizes).
Make sure the “base” or “all” layer (if there is one) stays on, as it may include notches, grainlines, and text.
5. Printing the Pattern (or Sending to a Copy Shop)
For print-at-home:
Open the correct file (A4 or US Letter, depending on your location).
Go to print settings. Set scaling to “100%” or “Actual Size.” Turn off “Fit” or “Shrink to Fit.”
Print only the page with the test square first.
Measure the test square with a ruler. If it’s accurate, proceed to print the remaining pages. If not, adjust settings and try again.
For copy shop printing:
Use the A0 (or large-format) file.
Either email it to a local printer or upload it to an online pattern printing service, following their instructions.
Specify that it must be printed at 100% scale.
Once printed, check the test square on the sheet before cutting.
6. Assembling a Print-at-Home Pattern
If you’re assembling at home:
Trim or fold the margins as directed (some patterns require you to trim one or two edges so the pages overlap correctly).
Lay out rows of pages on a large surface following the layout diagram.
Tape where the markings align—often there will be letters or symbols to match.
Once all rows are taped, tape them together.
You’ll end up with a full-size sheet (or several) that looks similar to a traditional pattern sheet, only sturdier.
7. Cutting Out the Pattern Pieces
Decide whether you want to:
Cut directly into the printed pattern, or
Trace it onto pattern paper for a longer-lasting master copy.
If you’ve printed only your selected sizes, cutting directly is simpler. If you might need other sizes later, tracing can preserve your printed copy. Either way:
Cut neatly along your chosen size lines.
Transfer all markings: notches, darts, grainlines, fold lines, pocket placement, etc.
8. Using a Projector (Optional)
If you’re trying projector sewing:
Set up your projector so it points onto your cutting surface.
Open the projector file on your device and project it onto your fabric.
Use the calibration square in the file to adjust the projector so that the square measures correctly in real life.
Adjust brightness, contrast, and zoom until lines are clear.
Cut your fabric following the projected lines, using weights, pins and scissors.
Projector sewing can feel easy once it’s set up: no paper, no taping, and incredibly fast cutting.
9. Cutting Your Fabric
From here, you’re on familiar ground:
Lay out your fabric as directed (folded or single layer), respecting grainline arrows.
Pin or weight your pattern pieces in place, or follow the projected lines if using a projector.
Cut carefully and transfer any notches, darts, or markings to your fabric using your preferred method.
10. Sewing the Garment
Follow the instructions in the booklet step by step. Digital patterns often come with:
Photo tutorials of each step.
Extra explanations of terminology.
Links to videos for tricky techniques.
You sew just as you would with a paper pattern. The “digital” part has already done its job by this point.
Organizing and Backing Up Your Digital Patterns
A little bit of structure goes a long way with digital patterns. You don’t need anything fancy—just a system you can stick to.
For digital files:
Keep a single main folder like “Digital_Patterns.”
Inside, create subfolders by designer (e.g., “DesignerName”) or by type (e.g., “Tops,” “Pants,” “Dresses”). Choose whichever you’re more likely to remember.
Make sure you save every new pattern straight away and in the right folder.
Back up periodically to an external drive or a cloud service (e.g., Google Drive, Dropbox, OneDrive).
For physical pieces:
Use large envelopes, plastic wallets, or A4 folders for each pattern you’ve printed and used.
Label each with the pattern name, designer, and size you cut.
Store in a box, magazine file, or hanging file system.
If you keep notes about what you changed or how the fit turned out, tuck them into the same envelope. Next time you sew that pattern, you’ll thank yourself.
Transitioning Smoothly from Traditional to Digital Patterns
If you’re used to walking into a shop and leaving with an envelope in your hand, it can feel strange to move into a more digital workflow. You don’t need to switch everything at once.
Here are some ideas for a gentle transition:
Start with a small project. Choose something with relatively few pattern pieces, like a simple top or a skirt, so the printing and taping don’t feel overwhelming.
Use copy shop printing first. If taping sounds like too much, try ordering the A0 sheet and treating it exactly like a traditional pattern sheet.
Keep your old habits where they help. You can still:
Trace your pattern pieces.
Store printed pieces in envelopes.
Write notes on the envelope about fit and fabric.
Practice with one or two designers you like. Once you get used to how they format their patterns and instructions, each new pattern from them will feel easier.
Give yourself permission to experiment. You might end up mixing approaches—maybe digital for clothing and traditional envelopes for complex tailoring, or digital for independent designers and envelopes for the big commercial brands.
Final Thoughts
Digital sewing patterns are simply another tool in your sewing toolbox. They don’t replace your skills or your creativity—they just give you new ways to access patterns, store them, and customize your sewing.
Yes, there’s a small learning curve at first: understanding file formats, figuring out printing, and finding an organization system. But once you’ve gone through the process a couple of times, it becomes routine. The rewards—instant access, endless reprints, better sizing options, and a thriving online community—are well worth that initial investment of time.
You already know how to sew. Digital patterns just change how the paper gets those lines onto your fabric. With some practice, and you persevere, you’ll be clicking “download,” printing and sewing up your next garment with quickly and hassle free.
About the Author
admin
This is a website that that is passionate about all things hand crafted, including hang made scarves, fishing, and gardening, scrapbooking, and even woodworking.
We have some handy advice and tips, you can read.