Hand embroidery is one of the most relaxing and rewarding needlecrafts you can learn. With just a needle, some thread, and a piece of fabric, you can create delicate details, bold patterns, or even mini works of art. This guide will walk you through everything you need to know to start hand embroidering confidently, from choosing materials to mastering your first stitches and finishing a simple project.
1. What Is Hand Embroidery?
Hand embroidery is the art of decorating fabric using a needle and thread (or yarn). Instead of using a sewing machine, every stitch is hand-sewn. Embroidery can be used to:
Personalize clothing (like adding initials to a shirt or denim jacket)
Decorate home items (pillows, table linens, wall hoops)
Embellish accessories (tote bags, hats, pouches)
Create framed artwork or gifts
Unlike basic sewing, which focuses on joining fabric pieces, embroidery focuses on surface design. You work with a variety of stitches to create outlines, textures, shading, and patterns.
2. Basic Supplies You Need To Start
You do not need many supplies to begin hand embroidery. Here are the essentials and how to choose them.
2.1 Fabric
Choose a fabric that is not too stretchy and has a fairly even weave so your needle can pass through easily.
Good beginner options:
Cotton (plain weave or quilting cotton)
Linen or linen blends
Cotton canvas (for tote bags or sturdier projects)
Avoid very slippery or stretchy fabrics (like silk or jersey) for your first projects.
2.2 Embroidery Hoop
An embroidery hoop keeps your fabric taut, which makes stitching easier and neater.
Size: 6 to 8 inches is perfect for beginners.
Material: Wooden hoops feel classic and are comfortable to hold. Plastic hoops grip a bit tighter and are easy to clean.
To use a hoop:
Loosen the screw at the top.
Separate the inner and outer rings.
Place your fabric over the inner ring.
Press the outer ring on top.
Gently pull the fabric edges until they are smooth and drum-tight.
Tighten the screw.
2.3 Needles
Embroidery needles have a sharp point and a slightly larger eye to fit thicker thread.
Look for:
Embroidery or crewel needles (sizes 5 to 9 are good for beginners)
Sharps (for finer work)
If you are unsure, buy a small mixed pack labeled “embroidery needles.”
2.4 Thread
The most common thread for hand embroidery is stranded cotton embroidery floss.
It usually comes as 6 strands twisted together.
You can use all 6 strands for thicker, bolder lines or separate the floss and use fewer strands for delicate details.
For beginners:
Start with 2 or 3 strands for most stitches.
Choose a small palette of colors you love so your project feels inspiring.
2.5 Scissors
Use small, sharp scissors to cut your thread cleanly. Embroidery scissors or small sewing scissors work best. Avoid using regular household scissors, as they can fray the thread.
2.6 Marking Tools
To transfer or draw your design on fabric, you can use:
Water-soluble fabric pen
Heat-erasable pen
Light pencil (on light fabrics)
Always test on a scrap first to make sure the lines will erase or wash out.
2.7 Optional Helpful Extras
Needle threader (if threading the eyes is difficult)
Thimble (to protect your finger when pushing the needle)
Fabric stabilizer (for very thin or stretchy fabrics)
3. Preparing Your Fabric And Design
A little preparation makes stitching smoother and your finished piece more polished.
3.1 Wash And Iron Your Fabric
If you plan to wash the finished item later (like clothing or towels), pre wash and dry the fabric first. Then iron it flat so you start with a smooth surface.
3.2 Choose Or Create A Design
For your first embroidery project, keep the design simple. Good beginner motifs include:
Flowers and leaves
Simple words or short quotes
Hearts, stars, or geometric borders
Small animals or outlines
You can draw your own design or print a pattern from a book or online source.
3.3 Transfer The Design To Fabric
There are several easy ways to transfer a design.
Tracing through the fabric (for light fabrics):
Place the design on a flat surface.
Lay your fabric on top.
Tape both down so they do not move.
Use a fabric pen or pencil to trace the lines.
Using a window or lightbox:
Tape the design to a window.
Tape the fabric over it.
The light will shine through so you can trace.
Using transfer paper:
Place the transfer paper face down on the fabric.
Put the pattern on top.
Trace over the lines with a pen or stylus so the design transfers onto the fabric.
When you are done, place the fabric in the hoop and tighten it as described earlier.
4. How To Thread Your Needle And Start Stitching
4.1 Separating Floss Strands
Most embroidery floss comes in 6-strand bundles. If you want to stitch with 2 strands:
Cut a piece of floss about 18 inches long. Longer lengths tend to tangle.
Gently separate out 2 individual strands, one at a time, holding the rest of the floss between your fingers so it does not knot.
Lay the 2 strands side by side and smooth them together.
4.2 Threading The Needle
Wet the very tip of the floss lightly if needed to keep it together.
Trim the end cleanly with sharp scissors.
Push the end through the eye of the needle or use a needle threader.
You can either:
Tie a small knot at the end of the floss, or
Use a “waste knot” or “no knot” start for a neater back (more on that below).
4.3 Starting And Ending Threads Neatly
For practice pieces, a knot at the back is fine. For nicer work, try this method:
To start without a knot:
Leave a small tail (about 1 inch) at the back when you make your first stitch.
Hold the tail in place and cover it by stitching over it with the next few stitches.
To end your thread:
Turn your hoop over so you can see the back.
Slide your needle under 3 to 4 stitches at the back.
Pull the floss through and trim off the excess.
This keeps the back tidy and avoids bulky knots.
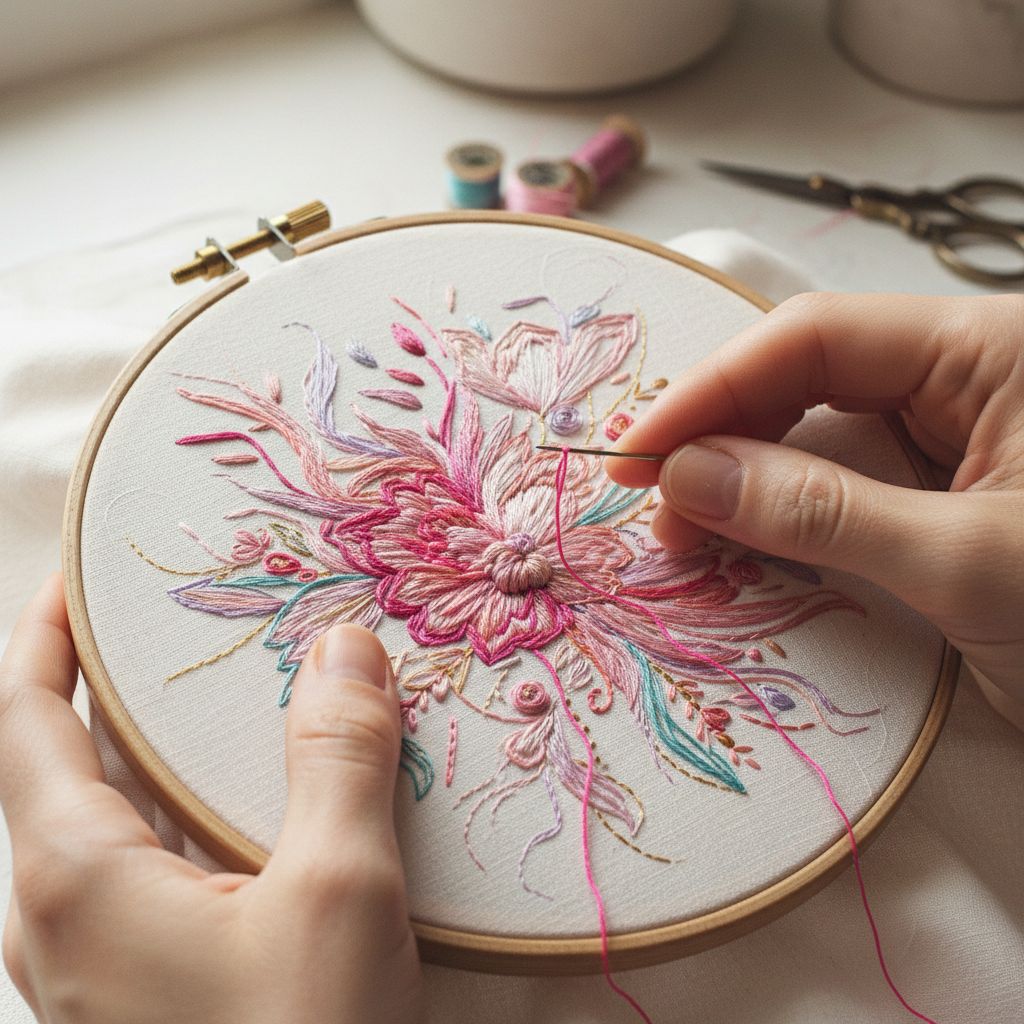
5. Essential Beginner Stitches (Step By Step)
These core stitches are enough to complete many beautiful projects. Practice them on a scrap of fabric first.
5.1 Running Stitch
Use it for outlines, borders, or simple lines.
Bring the needle up from the back of the fabric at point A.
Move forward a short distance and push the needle down at point B.
Continue making small, even stitches, leaving equal spaces between them, like a dashed line.
To make it smoother, you can shorten the gaps between stitches.
5.2 Backstitch
Great for outlines, lettering, and clean lines.
Bring the needle up at point A.
Move forward and go down to point B.
Come up again a stitch length ahead at point C.
Insert the needle back into point B, which is the end of the previous stitch.
Repeat steps 3 and 4. Each new stitch is pulled back into the end of the previous stitch, creating a solid line.
5.3 Split Stitch
Creates a textured, rope-like line, good for outlines or filling small shapes.
Bring the needle up at point A.
Move forward and go down to point B.
Come up again through the middle of the previous stitch, literally splitting the thread.
Repeat: go forward, then come up, splitting the last stitch.
5.4 Satin Stitch
Perfect for filling in small shapes with smooth color.
Outline the shape with a backstitch if needed to define the edges.
Bring the needle up at one edge of the shape.
Go down directly across on the opposite edge, making a straight stitch that spans the full width.
Come up again very close to the first stitch and go down close to where the last stitch ended.
Continue placing your stitches side by side, as close together as possible, to create a smooth surface.
Keep your tension even so the stitches sit flat without puckering the fabric.
5.5 Stem Stitch
Great for curved lines, stems, and outlines.
Bring the needle up at point A.
Move forward and go down at point B.
Come up again slightly back and just below or above the line, near the middle of the previous stitch.
Repeat along the line, keeping the working thread on the same side of the needle (either above or below).
This creates a slightly twisted line that looks like a rope or plant stem.
5.6 French Knot
Adds tiny dots and texture for flower centers, eyes, and details.
Bring the needle up at point A.
Hold the thread taut with your non-dominant hand.
Wrap the thread around the needle 1 or 2 times (more wraps create a larger knot).
Keeping the wraps snug, insert the needle back into the fabric very close to point A, but not in the exact same hole.
Gently pull the thread through while still holding the wraps so the knot forms on the fabric surface.
Practice a few times until your knots are firm but not too tight.
5.7 Lazy Daisy (Detached Chain Stitch)
Ideal for flower petals and leaf shapes.
Bring the needle up at point A (the base of the petal).
Insert the needle back near the same point, but do not pull the thread all the way through. Leave a loop on the surface.
Bring the needle up at point B, at the tip of where you want the petal to end, catching the loop with the needle as you come up.
Gently pull the thread to tighten the loop into a petal shape.
Make a tiny straight stitch over the end of the loop at point B to hold it in place.
Repeat around a center point for a full flower.
6. Putting It All Together: Your First Simple Project
Let us combine what you have learned into an easy beginner project: a small floral hoop.
6.1 Materials
6 or 7-inch embroidery hoop
Light colored cotton fabric, slightly larger than your hoop
Embroidery floss in green, one or two flower colors, and a contrasting color for centers
Needle, scissors, and fabric pen
6.2 Design
Draw a simple curved line like a stem across the lower half of the hoop. Add a few small leaves along it and 3 to 5 simple flower shapes using circles or petal clusters.
6.3 Stitch Choices
Stem: Stem stitch
Leaves: Satin stitch or lazy daisy
Flower petals: Lazy daisy
Centers: French knots
6.4 Step By Step
Place your fabric in the hoop and tighten it.
Thread your needle with 2 or 3 strands of green floss.
Stitch the stem along the drawn line using stem stitch.
Fill the leaves using satin stitch or a single lazy daisy for each leaf.
Switch to your flower color floss.
Work lazy daisy stitches around each circle or point to form petals.
Finally, use a contrasting color to add French knots in the center of each flower.
Take your time and enjoy the rhythm of stitching.
7. Avoiding Common Beginner Mistakes
7.1 Pulling The Thread Too Tight
If your fabric puckers or gathers around your stitches, you are likely pulling too hard. Aim for snug, not tight. The stitches should lie flat without distorting the fabric.
7.2 Using Very Long Pieces Of Thread
Long threads tangle and fray more. Stick to about 18 inches at a time. It is better to rethread more often than to constantly fight knots.
7.3 Crowded Or Messy Backs
A neat back is not required, but it does help your work lie flatter and last longer.
Avoid jumping long distances with the thread on the back.
End threads by weaving under existing stitches rather than tying big knots.
7.4 Starting With A Complicated Design
If your first project is too detailed or large, it can become frustrating. Begin with small motifs so you can finish them and build confidence.
8. Caring For Your Finished Embroidery
Once you complete your piece, a few finishing steps will help it look its best.
8.1 Washing (If Needed)
If you used washable marking pens and your fabric and thread are colorfast:
Fill a bowl with cool or lukewarm water and a tiny amount of mild soap.
Gently swish the embroidery in the water. Do not scrub.
Rinse thoroughly in clean water.
Lay flat on a towel, roll it up to remove excess water, then press flat to dry.
8.2 Pressing
Iron the embroidery from the back side to avoid flattening the texture of your stitches.
Place the piece face down on a clean towel.
Cover with a pressing cloth.
Use a warm iron and press gently.
8.3 Finishing In The Hoop
If your piece will stay in the hoop as wall art:
Make sure the fabric is centered and tight.
Trim the excess fabric at the back, leaving about 1 inch.
Run a line of gathering stitches around the edge of the fabric and pull gently to draw it toward the center.
Secure with a few knots.
Optionally, glue a felt circle over the back to hide raw edges.
8.4 Other Finishing Ideas
Sew your embroidered piece into a pillow cover.
Add it as a patch to a tote bag or jacket.
Frame it behind glass like an artwork.
9. Building Skills And Exploring More
Once you feel comfortable with the basic stitches, you can expand your skills in many directions.
9.1 Learn New Stitches
There are hundreds of embroidery stitches, but you do not need them all.
After mastering the basics, you might explore:
Chain stitch
Fly stitch
Blanket stitch
Seed stitch
Long and short stitch (for shading)
Practice each new stitch on a sampler fabric to keep as a reference.
9.2 Experiment With Texture And Color
Combine thick and thin threads in one design.
Mix smooth satin stitched areas with textured knots or split stitch.
Try monochrome designs using different stitches instead of many colors.
9.3 Try Different Fabrics And Items
As you gain confidence, move beyond practice hoops.
Embroider on denim jackets or jeans.
Add small motifs to collars, cuffs, or pockets.
Decorate zipper pouches, napkins, or table runners.
9.4 Create Your Own Patterns
Start sketching simple designs in a notebook. Think about which stitches would work best for each line or shape. Over time, you can develop your own style.
10. Final Thoughts
Hand embroidery is a slow, mindful craft that rewards patience and curiosity. You do not need perfect stitches to create something beautiful. Focus on:
Keeping your fabric smooth and thread lengths reasonable
Practicing a few core stitches until they feel natural
Enjoying the process of watching your design appear, one stitch at a time
With basic tools, a handful of stitches, and a simple design, you can start today. As you practice, your hands will become more confident, your stitches more consistent, and your projects more ambitious. Soon you will be able to embellish clothing, create custom gifts, and design your own embroidered artwork, all stitched by hand.
About the Author
admin
This is a website that that is passionate about all things hand crafted, including hang made scarves, fishing, and gardening, scrapbooking, and even woodworking.
We have some handy advice and tips, you can read.