Machine Embroidery for Beginners: A Friendly Guide to Stitching with Style
Machine embroidery is one of those hobbies that looks intimidating from the outside, with whirring machines, digital designs, and specialized threads, but once you understand the basics, it becomes a fun, creative, and surprisingly relaxing craft. Whether you want to personalize gifts, decorate your home, or even start a small business, machine embroidery can open up a world of colorful possibilities.
This guide will walk you through what machine embroidery is, how it differs from hand embroidery, what equipment you need, and how to create your first design step by step. Along the way, you’ll learn about common mistakes, simple troubleshooting, and practical tips to get professional-looking results right in your own home.
What Is Machine Embroidery?
Machine embroidery is the process of using a sewing or embroidery machine to stitch designs onto fabric. Instead of carefully stitching each line and shape by hand, a motorized machine moves the needle and fabric in precise patterns to create letters, borders, pictures, and intricate motifs.
Modern embroidery machines use digital designs that you load into the machine. Once the design is selected and your fabric is hooped and stabilized, the machine does most of the stitching automatically. Your main job becomes choosing the right design, colors, and materials, and setting everything up correctly.
You can use machine embroidery to:
Personalize towels, T-shirts, and bags with names or monograms
Decorate baby blankets, quilts, and pillows
Add logos to uniforms or workwear
Create patches, appliqués, and labels
Embellish home décor like table runners and curtains
If you already sew, machine embroidery will feel like an exciting extension of what you know. If you’re new to any kind of stitching, don’t worry, this guide is designed for you.
A Short History of Machine Embroidery
Embroidery as an art form goes back thousands of years, long before machines were invented. For most of history, every stitch was made by hand with needle and thread.
The Industrial Revolution changed that. In the 1800s, inventors began adapting early sewing machines to create decorative stitches. Large, complex machines were developed for factories in Europe, especially in Switzerland and France, to produce lace and embroidered fabrics at scale. These machines were huge, expensive, and operated by skilled workers, far beyond the reach of home hobbyists.
Home sewing machines gained popularity in the late 19th and early 20th centuries, and over time, decorative stitch capabilities expanded. But true computerized embroidery machines for home use didn’t appear until the late 20th century. As computers got smaller, cheaper, and more powerful, sewing machine manufacturers integrated digital controls, memory cards, and eventually USB ports and wireless connections.
Today, home embroidery machines can read designs from USB drives or the cloud, stitch thousands of stitches accurately, and even automatically cut jump threads. What once required industrial equipment is now possible in a spare bedroom or on a kitchen table.
Hand Embroidery vs. Machine Embroidery
Both hand and machine embroidery are creative, satisfying ways to decorate fabric, but they differ in process, speed, and look.
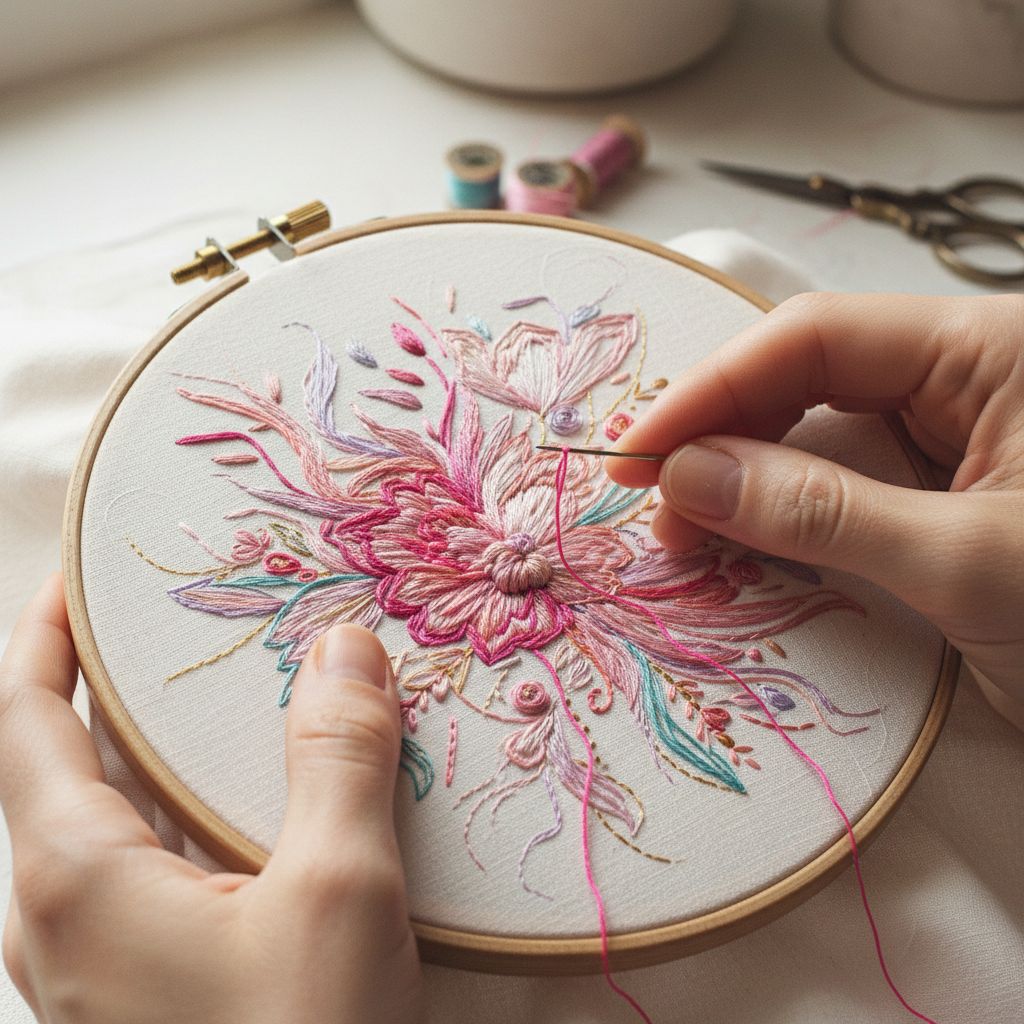
Hand embroidery involves using a simple hand needle, embroidery floss, and a hoop. Every stitch is placed individually by the embroiderer. It’s slow, meditative, and allows for a lot of artistic interpretation. Hand embroidery often has a more textured, organic look, with visible variation in stitch length and direction.
Machine embroidery is much faster and more consistent. Once a design is set up, your machine can stitch hundreds or thousands of stitches in minutes. The results are crisp and uniform, which is perfect for lettering, logos, and repeated designs. It’s especially useful if you want to make multiples, like matching shirts or sets of napkins.
In short:
Hand embroidery is ideal for painterly, artistic pieces, and when you enjoy slow, detailed work.
Machine embroidery is ideal for precision, speed, and repeatability, even on complex designs.
Many crafters enjoy both. If you already hand embroider, you might use machine embroidery for base designs and then add hand-stitched details on top.
Basic Equipment You’ll Need
Before you begin stitching, you’ll need a few key pieces of equipment. You don’t have to buy the most expensive machine or every gadget on the market. Start with the basics, learn how they work together, and then add more tools as your skills grow.
1. Types of Embroidery Machines
There are three main categories you’ll see:
Embroidery-only machines
These machines are dedicated solely to embroidery. They cannot do regular sewing. You load a design, set up your hoop, and the machine takes care of the rest. These machines are often user-friendly and a good choice if you mainly want to embroider.
Combination sewing and embroidery machines
These machines can switch between regular sewing and embroidery. In sewing mode, they work like a normal sewing machine. In embroidery mode, you attach an embroidery unit and hoop to stitch designs. They’re great if you also sew clothes, quilts, or home décor.
Multi-needle embroidery machines
These are more advanced and typically more expensive. They have multiple needles threaded with different colors, so the machine can switch colors automatically. They’re faster and are often used by small businesses, but most beginners start with a single-needle machine.
When choosing a machine, consider:
Hoop size (larger hoops let you stitch bigger designs without re-hooping)
How designs are loaded (USB, Wi-Fi, built-in designs)
Ease of threading and bobbin winding
A clear, well-written manual and good local or online support
You don’t need every fancy feature right away. A reliable machine with a modest hoop size (like 4″×4″ or 5″×7″) is plenty to learn on.
2. Stabilizers: The Unsung Hero
Stabilizer is a material placed behind or sometimes on top of your fabric to support it during stitching. Without stabilizer, most fabrics will pucker, stretch, or become distorted under the stress of dense stitches.
The main types are:
Tear-away stabilizer
This is paper-like and can be torn away after stitching. It’s good for stable, woven fabrics like cotton and for designs that are not extremely dense.
Cut-away stabilizer
This is thicker and stays permanently in the fabric. You cut away the excess around the design. It provides excellent support and is great for stretchy fabrics like T-shirts and sweatshirts, as well as dense embroidery designs.
Wash-away stabilizer
This dissolves in water. It’s used for delicate fabrics, freestanding lace, or situations where you don’t want stabilizer to remain. It’s also often used as a topping on pile fabrics like towels and fleece to prevent stitches from sinking in.
Choosing the right stabilizer is one of the most important skills in machine embroidery. A simple rule of thumb, the stretchier or looser your fabric, the more stable your stabilizer should be.
3. Threads for Machine Embroidery
Embroidery thread is not exactly the same as regular sewing thread. It’s usually more lustrous and designed to run smoothly at high speeds.
The most common types are:
Polyester embroidery thread
Durable, colorfast, and bleach- and sunlight-resistant. It’s ideal for clothing that’s washed often, like T-shirts and kids’ clothes.
Rayon embroidery thread
Known for its beautiful, shiny finish and smooth appearance. It’s softer than polyester but slightly less strong and can be more sensitive to harsh washing.
Cotton and specialty threads
Cotton gives a more matte, natural look, nice for heirloom or vintage-style embroidery. Metallic, variegated, and glow-in-the-dark threads can add fun effects but may require slower stitching and specific needles.
Most beginners start with good-quality polyester or rayon thread and a small, basic color palette, a few neutrals like black, white, gray, and some favorite accent colors. Over time, your thread collection will naturally grow.
4. Needles: Small but Important
Machine embroidery needles are slightly different from regular sewing needles. They usually have:
A larger eye to reduce friction on the thread
A specialized point to handle dense stitching
The most common sizes for embroidery are 75/11 and 80/12. Use finer needles (smaller numbers) for light fabrics and heavier needles for thicker or denser fabrics.
There are also special needles for metallic threads and for very stretchy knits. Changing your needle regularly, after several hours of stitching or at the first sign of trouble, can prevent many problems, such as thread shredding or skipped stitches.
5. Fabrics for Machine Embroidery
You can embroider on many types of fabric, cotton, linen, denim, fleece, knits, even leather or vinyl. For beginners, it’s smart to start with easy, stable fabrics like:
Woven cotton (quilters’ cotton is excellent for practice)
Lightweight canvas
Medium-weight linen or blends
Stretchy T-shirts and delicate fabrics like silk or chiffon are trickier and require more careful hooping and stabilizing. Once you build confidence, you can branch out to more challenging materials.
Always test your design on a scrap of the same fabric and stabilizer before stitching on your final project.
The Step-by-Step Process: From Design to Finished Piece
Now let’s walk through how a basic embroidery project comes together, from idea to finished item.
1. Choosing or Creating a Design
Embroidery designs are digital files that tell your machine where to place each stitch. They come in specific formats that must match your machine’s requirements.
You have three main options:
Use built-in designs stored in your machine
Purchase or download designs from reputable online shops
Create your own designs using digitizing software
For beginners, using built-in or purchased designs is the simplest route. Look for designs labeled as suitable for beginners or for your machine’s hoop size. Pay attention to the stitch count; very high stitch counts create dense designs that can be challenging on some fabrics.
Digitizing, converting artwork into a stitch file, is a skill of its own. If you’re curious, you can explore it later with dedicated software, but it’s not necessary to start.
2. Preparing and Hooping Your Fabric
Hooping is the process of placing your fabric and stabilizer in the embroidery hoop so they are held taut and flat. Good hooping is critical for clean, professional results.
First, cut a piece of stabilizer slightly larger than your hoop. Then prepare your fabric, press out wrinkles, and if needed, lightly starch it to add a bit of body.
Place the stabilizer and fabric together. Depending on the project and stabilizer type, you can:
Hoop both fabric and stabilizer together, or
Hoop the stabilizer only and then adhere the fabric on top with temporary spray adhesive or sticky stabilizer (a method often used for tricky or delicate fabrics)
When hooping, aim for the fabric to be smooth and drum-tight, but not stretched out of shape. If you pull the fabric too tightly in the hoop, it can spring back after stitching, causing puckering. Most hoops have marks to help you align the fabric, keeping your design centered and straight.
Take your time with hooping, it’s worth the effort.
3. Setting Up the Machine
Once your fabric is hooped, attach the hoop to the machine. Make sure it clicks in securely.
Next steps:
Thread the top thread according to your machine’s guide
Insert a pre-wound or freshly wound bobbin with bobbin thread (often a finer thread than the top)
Load your design into the machine and select it on the screen
Confirm the design fits within the hoop size you’re using
Most machines will show you a preview of where the design will stitch. You can usually move it slightly, rotate it, or resize it within limits.
Check that the needle is new or in good condition, and that the presser foot is set for embroidery.
4. Test Stitching
A test stitch-out is one of the best habits you can develop. Before stitching on your final project:
Use a scrap of the same fabric and stabilizer
Hoop it properly
Stitch your design completely
As the machine stitches, watch for problems like:
Thread breaking or shredding
Fabric puckering or shifting
Design looking too dense or distorted
A test run lets you adjust tension, try a different stabilizer, change thread colors, or resize the design before you risk your actual item. It may feel like an extra step, but it saves time and frustration in the long run.
5. Stitching the Real Thing
After you’re happy with your test, it’s time to embroider your main piece.
Attach the hooped project, double-check the thread and bobbin, and start the machine. Many embroidery machines will pause for color changes. When the machine stops:
Clip any jump threads if needed
Change the top thread to the next color
Check the back to make sure the stitches and tension look even
Try not to walk away completely while the machine is stitching, especially as a beginner. Staying nearby helps you catch problems early, like a thread tangle or a hoop that wasn’t secured properly.
6. Finishing and Clean-Up
When the design is complete, carefully remove the hoop from the machine, then remove the fabric from the hoop.
Finish by:
Tearing or cutting away the stabilizer according to the type used
Trimming any loose threads on the front and back
Gently pressing the embroidered area from the back with an iron, using a pressing cloth to protect the stitches
If you used a wash-away stabilizer, follow the instructions to rinse or dissolve it. Let the piece dry flat.
At this point, your design is complete. If it’s part of a larger sewing project, like a quilt block or a shirt front, you can now continue with the rest of your construction.
Common Mistakes and How to Fix Them
Every embroiderer, no matter how experienced, runs into issues. Knowing the most common problems and how to address them will speed up your learning curve.
Puckering Fabric
Puckering and wrinkling around the design are often caused by insufficient stabilization, improper hooping, or a design that’s too dense for the fabric.
To prevent it:
Use a stronger stabilizer (move from tear-away to cut-away on stretchy fabrics)
Hoop your fabric flat and firm, but not stretched
Avoid flimsy fabrics for dense designs, or choose designs with lighter stitching
If puckering has already happened, a gentle press from the back can sometimes improve it, but severe puckering is hard to fix completely.
Thread Breaks and Shredding
Frequent thread breaks can be frustrating. Common causes include:
Old, low-quality, or damaged thread
A dull or wrong-type needle
Incorrect threading path
Tension that’s too tight
Try re-threading the machine top and bobbin, changing to a new embroidery needle, and slowing down the stitching speed. If the problem persists, switch to a different brand of thread to see if it helps.
Poor Tension or Loops on the Back
If you see loops of top thread on the back or bobbin thread showing on top, your tension may be off or the machine may be threaded incorrectly.
Re-thread both the top and bobbin carefully. Then do a small test stitch and adjust tension if your machine allows it. The goal is a balanced stitch where the threads lock neatly in the middle of the fabric.
Design Misalignment
If the design looks crooked or shifted, the hoop may have moved, or the fabric may not have been hooped securely.
Make sure:
The hoop is firmly latched to the machine
The fabric is properly hooped and not just floating loosely
You don’t bump the hoop while the machine is running
For multi-hoop or multi-position projects, careful marking and hooping are essential to keep everything aligned.
Practical Tips for Professional-Looking Results
You don’t need an industrial machine to get polished results. A few thoughtful habits go a long way.
Start with Simple Projects
Choose designs with fewer colors and moderate stitch counts. Practice on stable fabrics like cotton. Good beginner projects include:
Monogrammed towels
Simple designs on tote bags
Small motifs on quilt blocks or potholders
Master the basics, and you’ll be ready for more complex projects faster than you think.
Use Quality Materials
Better thread, stabilizer, and needles really do make a difference. Cheap materials can cause more breaks, puckering, and frustration. You don’t have to buy the priciest options, but mid-range, reputable brands are usually worth it.
Keep a Notebook or Project Log
Record what works, especially:
Fabric type and weight
Stabilizer type and layers used
Needle size and thread brand
Any tension adjustments and machine settings
When you return to a similar project later, your notes will save you time and guesswork.
Clean and Maintain Your Machine
Embroidery creates a lot of lint and dust. Regularly clean the bobbin area and surrounding parts according to your manual, and oil the machine where recommended. A well-maintained machine runs more quietly, breaks fewer threads, and produces cleaner stitches.
Don’t Skip the Test Stitch
It’s tempting to jump straight to the final item, especially if you’re excited about a new design. But test stitching on a scrap that matches your project fabric and stabilizer is one of the best ways to avoid disappointment.
Learn from the Community
There are many online groups, forums, and videos dedicated to machine embroidery. Watching others hoop tricky fabrics, troubleshoot problems, and compare stabilizers can give you insights that are hard to get from a manual alone. Ask questions; embroiderers are generally generous with their tips and experiences.
Ready to Start Your First Project?
Machine embroidery can look complex from the outside, but at its heart, it’s a surprisingly straightforward process: choose a design, stabilize and hoop your fabric, set up your machine, and let it stitch. The more you practice, the more natural each step becomes.
You don’t need a huge budget or a professional studio. A basic machine, some good stabilizer, a handful of threads, and a small stack of fabric scraps are enough to begin. Start simple, perhaps a monogrammed kitchen towel, a small design on a tote bag, or a pretty motif on a pillowcase.
Along the way, you’ll make mistakes. Everyone does. Each project, even the imperfect ones, teaches you something about stabilizers, fabrics, tension, or hooping. With each design you stitch, your confidence grows.
So pick a design that makes you smile, gather your materials, and set up your machine. Your first embroidered project doesn’t have to be flawless; it just has to be finished. From there, you can only improve, and you may discover a creative hobby that lasts for years.
About the Author
admin
This is a website that that is passionate about all things hand crafted, including hang made scarves, fishing, and gardening, scrapbooking, and even woodworking.
We have some handy advice and tips, you can read.