If you have ever admired tiny wool animals, soft sculpted brooches, or beautifully textured landscapes made from fluffy fiber, you have probably seen needle felting. It is a peaceful, hands-on craft that transforms loose wool into solid shapes using nothing more than a special barbed needle and repeated poking motions.
Whether you are looking for a relaxing hobby, a way to make custom gifts, or a path into handmade accessories and decor, needle felting is a wonderful place to start. This guide will walk you through what needle felting is, the tools and materials you need, how the process works, beginner techniques, common mistakes, and a simple first project.
What Is Needle Felting?
Needle felting is a fiber art technique that uses a barbed needle to tangle and compress wool fibers, causing them to lock together and form a dense material. Instead of weaving or knitting, you work directly with loose fibers, shaping them as you go.
Each time you push the needle into the wool and pull it out, tiny barbs along the needle grab the fibers and pull them inward. Over time, the fibers become increasingly entangled, turning a fluffy mass into a firm, sculpted shape.
You can use needle felting to make:
Small animals and characters (amigurumi-style figures)
Jewelry and accessories like brooches, pendants, and earrings
Embellishments on hats, scarves, and bags
Flat pictures and “wool paintings.”
Ornaments and decorative objects for your home
The magic of needle felting lies in its ability to be both sculptural and painterly. You can build three-dimensional forms, then add surface details, color and texture much like you would with paint or clay.
Essential Tools And Materials
One of the big advantages of needle felting is that you do not need a lot of equipment to begin. A basic starter kit can easily fit in a small box.
1. Felting Needles
Felting needles look similar to regular sewing needles but they are longer, thicker, and have small notches (barbs) near the pointed end. These barbs are what catch and tangle the fibers.
There are a few common types and sizes:
Gauge: The higher the number, the thinner the needle.
36 gauge: Coarser, good for fast shaping and working with bulk wool.
38 gauge: A versatile, general purpose needle for most tasks.
40 gauge: Finer, great for adding detail and smoothing the surface.
Shape:
Triangle: The most common, good for general felting.
Star: Has more sides and barbs, felts faster and can be smoother.
Reverse: Pulls fibers outward instead of in, great for creating fluffy textures like fur.
For a beginner, starting with a single 36 or 38 gauge needle and a finer 40 gauge needle for finishing is usually enough.
Some people also use multi-needle tools that hold several needles at once for faster felting on larger areas. You can add those later as you get more comfortable.
2. Wool
Needle felting is almost always done with animal fibers that have scales and crimp, which allow them to tangle and hold shape. The most common is sheep’s wool, especially from the Merino or Corriedale breeds.
There are two main forms you will see:
Wool roving: Long, continuous strands of combed wool. This is smooth, aligned, and great for layering, wrapping, and adding color.
Wool batting: Flatter sheets or fluffy layers of wool. The fibers are less aligned and more airy, which can make it quicker to build up volume.
For sculpting small figures, a medium or coarse wool that felts easily is ideal. Super fine Merino is very soft but can be slower to felt into firm shapes, so it is often used more for surface detail and color blending.
You can also experiment with other fibers like alpaca or blends, but make sure they are labeled as suitable for felting. Synthetic fibers typically do not felt well on their own.
3. Felting Surface
Because needle felting involves repeatedly poking a sharp needle through wool, you need a surface underneath to protect your table and the needle tips.
Common options include:
Foam block: Dense craft foam or a purpose made felting block. Inexpensive and very popular.
Bristle brush mat: Looks like a short nail brush and allows needles to penetrate without getting stuck as easily.
Firm wool pad: A dense felt pad made of wool. More eco friendly and durable.
Choose a size that is comfortable for your projects. A block the size of a book is usually enough for small figures and accessories.
4. Optional Extras
As you progress, you may find these supplies useful:
Finger guards or leather thimbles to protect your fingertips
Wire for internal armatures in more complex figures
Glass or plastic eyes for realistic animals
Embroidery thread or beads for fine details
Small scissors for trimming loose fibers
How Needle Felting Works: The Basic Process
At its core, needle felting is very straightforward:
Tear off a piece of wool.
Shape it roughly with your hands into a ball, cylinder, or flat piece.
Place it on your felting surface.
Use the needle to poke into the wool repeatedly.
Rotate or flip the wool regularly so it felts evenly.
Add more wool to build size, change shape, or add color.
Over time, the wool transforms from a light, fluffy mass into a dense, springy structure. You can control how firm or soft a piece is by how long you felt it and how much wool you add.
A few key principles:
Deeper needle stabs pull fibers further inward, which helps shape and firm the core of the object.
Shallower, lighter stabs mostly affect the surface, which is good for smoothing and blending colors.
Direction matters: The angle and direction of your needle help determine how the fibers move, which lets you sculpt curves and edges.
Safety Tips For Needle Felting
Felting needles are very sharp, and the barbs can tear skin more than a smooth sewing needle. Always treat them with respect.
Some simple safety practices:
Work slowly and mindfully, especially when learning.
Always stab straight in and straight out to avoid bending or breaking the needle.
Keep your non-dominant hand behind or to the side of the needle, not directly in front.
Use finger guards if you tend to poke your fingertips.
Store needles in a container or a felted cushion when not in use.
Keep out of reach of small children and pets.
With a bit of care, needle felting is a very safe and relaxing craft.
Basic Techniques Every Beginner Should Learn
Before you move on to detailed animals or accessories, it helps to practice some fundamental shapes and motions.
1. Making A Firm Ball
Many projects begin with a simple sphere.
Tear off a strip of wool and roll it into a loose ball.
Start poking it with your needle, turning it as you work so you do not create flat sides.
Keep compressing and adding more wool if needed to reach the size and firmness you want.
Use a finer needle at the end to smooth the surface.
This teaches you how the wool shrinks and firms as you felt.
2. Creating Cylinders And Tubes
Cylinders are the basis for legs, arms, and simple bodies.
Roll a strip of wool into a tight tube between your hands.
Place it on the mat and feel along the length, turning it frequently.
Taper one end by poking more aggressively and at a slight angle.
Add more wool around the outside for thicker limbs or bodies.
3. Attaching Pieces
Most figures are made from several separate shapes that are felted together.
To attach, for example, a leg to a body:
Leave some loose fibers at the end of the leg instead of felting it completely smooth.
Position the leg on the body where you want it.
Use the needle to poke the loose fibers into the body repeatedly.
Add a small amount of extra wool over the join and felt it in to strengthen and hide the seam.
The goal is to fully integrate the fibers so it feels like one continuous piece.
4. Adding Color And Details
You can think of colored wool as paint.
For spots or markings, place a tiny tuft of colored wool on the surface and felt gently until it fuses.
For stripes or gradients, lay thin layers of color and blend the edges with shallow, careful stabbing.
For facial features, use very small amounts of wool and a fine needle so you can control the shape.
Common Beginner Mistakes And How To Avoid Them
Every new felter makes similar mistakes. Understanding them ahead of time will save you frustration.
Mistake 1: Using Too Much Wool At Once
It is tempting to start with a big handful of wool, but this makes shaping difficult and results in lumpy work.
Tip: Start small. You can always add more layers, but it is hard to remove excess once it is tightly felted.
Mistake 2: Not Felting Long Enough
Beginners often stop when the piece feels “firm enough” but it is still loose inside. This can lead to shapes losing form over time or details sinking in.
Tip: A fully felted piece feels springy and dense, not squishy. If your needle still sinks very easily and deeply, it likely needs more work.
Mistake 3: Poking At Random Angles
If you stab at many angles without control, your shape can become uneven or your needle may bend and break.
Tip: Keep your needle movements intentional. Go in and out at the same angle and rotate the wool instead of twisting your wrist excessively.
Mistake 4: Ignoring Proportions
With animal figures and characters, proportions matter. It is easy to accidentally make a head too large or legs too short.
Tip: Sketch a quick outline or use reference photos. Compare parts frequently. It is much easier to correct early than to fix later.
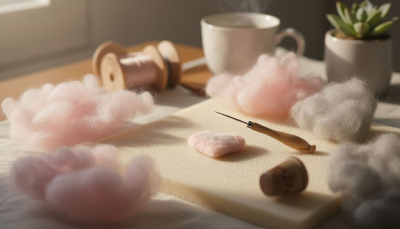
A Simple Beginner Project: Tiny Needle Felted Heart
To put everything together, let’s walk through a small, beginner friendly project you can complete in an evening. This project is perfect as a charm, brooch, or practice piece.
Materials
Wool roving or batting in your chosen color (red, pink, or any shade you love)
One 36 or 38 gauge needle for shaping
One 40 gauge needle for smoothing (optional but helpful)
Felting mat or foam block
Small scissors (optional)
Step 1: Form The Basic Shape
Tear off a piece of wool about the length of your hand.
Gently roll it into a loose oval or bean shape. This will become the main body of your heart.
Place it on your felting surface.
Step 2: Roughly Felt The Oval
Use your general needle to start poking into the center of the wool, turning it as you go.
Aim for a slightly flattened oval, firming it up but not finishing the edges yet.
Keep rotating to avoid creating hard lines or flat spots.
You now have a soft, oval “pillow” of wool.
Step 3: Create The Heart Point
Decide which end will be the bottom point.
Focus your needle work on that end, poking at a slight angle toward the center.
This will pull fibers down and inward, gradually creating a tapered point.
Rotate the piece and continue until you are happy with the shape.
Step 4: Form The Heart’s Top Indent
At the opposite end of the point, imagine a line down the middle.
Use your needle to poke deeply along this line, creating an indent that separates the two top “bumps” of the heart.
Work slowly and evenly so the indent is centered and smooth.
Add a little extra wool if needed to build up the rounded tops on either side of the indent.
Step 5: Refine And Smooth
Switch to your finer needle if you have one.
Go over the surface with lighter, shallower stabs to smooth out any lumps or loose fibers.
Check the heart from all angles and adjust the symmetry by felting a little more on the fuller side.
At this point, you have a finished felted heart. You can leave it as is, or:
Add a tiny white highlight spot with a small tuft of wool.
Attach a jump ring or pin back with glue to turn it into a charm or brooch.
Make several hearts in different sizes and colors to practice consistency.
Moving Beyond The Basics
Once you are comfortable with simple shapes like spheres, cylinders, and hearts, you can begin to experiment with more complex designs.
Some next step ideas:
Mini animals: Start with simple shapes such as a round body and a smaller round head, then gradually add legs, ears, and a tail.
Accessories: Felt small shapes directly onto felt fabric to create brooches, patches, or hair clips.
Wool “paintings”: Use a piece of prefelt or thick felt as a base and “draw” with colored wool roving to create landscapes, flowers, or abstract patterns.
You can also combine needle felting with other crafts:
Sew felted pieces onto bags, hats, or jackets.
Use felted beads in jewelry making.
Add needle-felted details to knitted or crocheted items.
The more you practice, the more you will understand how different wools behave, how much pressure to use, and how to plan your shapes.
Final Thoughts
Needle felting is a gentle, meditative craft that rewards patience and curiosity. With just a few basic tools and some wool, you can create charming figures, soft accessories, and unique art pieces that feel full of character.
Start small. Practice your basic shapes. Do not worry if your first creations look a little quirky. That individuality is part of the charm. Over time, your control will improve, your ideas will expand, and you will find your own style, whether that is realistic animals, whimsical characters, or elegant accessories.
About the Author
admin
This is a website that that is passionate about all things hand crafted, including hang made scarves, fishing, and gardening, scrapbooking, and even woodworking.
We have some handy advice and tips, you can read.