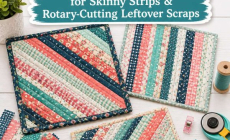
Who says camera straps have to be boring monochrome? If you’re looking to add a little pizazz to your camera gear, a bright, bold and geometric cross-stitch can look pretty damn awesome. This DIY will guide you on making your own camera strap, from the wonderfully meditative stitching process to attaching the final clasps.
MATERIALS -At least 85cm x 10cm of 6 count cross-stitch canvas (The count refers to how many squares are in the canvas per inch, so a larger number will give you smaller crosses.) -85cm length of 3.5cm wide cotton webbing/tape -Range of stranded embroidery cottons -5cm x 25cm strip (or 10cm square) of faux-leather or thick paper fabric -Pair of 20mm swivel lobster bag clasps -Tailor’s chalk -Basic sewing kit and sewing machine
1. Cut your cross-stitch canvas to an 85cm x 10cm strip if it’s a larger piece. Mark out a long rectangle in tailor’s chalk that’s 82cm long by 3.5cm wide along the middle of your strip of canvas. Make sure each of the long edges you mark lines up exactly with a row of holes in the canvas – on 6 count canvas, the rectangle worked out as exactly 8 squares wide.
2. Starting at one end of the strip you marked, begin sewing cross-stitch rows in your first colour. As this is a chunky canvas and I wanted the pattern bold, I’ve used all 6 strands of the stranded cotton together. For a really simple pattern, just sew rows straight across the narrow width of the rectangle, or for a more complex pattern work in diagonal stripes or points. Vary your colours and the number of rows you stitch in each colour to create your patterns.
3. Once you have stitched along the whole of the rectangle you marked (this will take a while), trim your canvas, leaving a 1.5cm excess around the stitched area.
4. Fold the extra canvas under along the two long edges.
5. Lay out your strip of cotton tape/webbing and pin your embroidered strip on top (they should be almost exactly the same width) along both long edges.
6. Sew along both long edges, keeping your stitches between the outer and the second row of crosses.
7. Cut two rectangles of faux-leather or paper-fabric, each 4cm x 10cm. Fold one in half so the shorter edges meet. Along the folded edge, mark a point 1.25cm in from each side, then mark a point 2cm up from the fold along each side. Join the two marks across each corner so that you have a diagonal line cutting across each corner. Cut along these lines then open out your folded piece again. Repeat with the second piece. Round off all the sharp corners a little on both your pieces.
8. Fold up one end of one of your faux-leather/paper-fabric pieces and thread it through the non-clip end of your lobster clasp. Lay your faux-leather/paper-fabric out flat again, with the lobster clip at the narrowest part in the centre. Repeat with your other clasp and other faux-leather/paper-fabric piece.
9. Using fabric clips (or pins, but these can be tricky through the thick fabrics) sandwich one end of your cross-stitched strip inside one of the faux leather/paper-fabric pieces, folding the faux leather/paper-fabric piece in half so all the edges match up. Do the same at the other end.
10. At both ends, sew around the edge of your faux leather/paper-fabric about 2mm in, stopping about 1cm before the clasp and sewing across then continuing along the edges.
This is a website that that is passionate about all things hand crafted, including hang made scarves, fishing, and gardening, scrapbooking, and even woodworking.
We have some handy advice and tips, you can read.