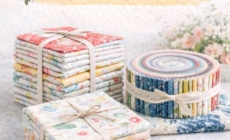
Ensure that the fabric is of a good quality and does not shrink after washing. You should then decide on the size, though it’s usually good to opt for the standard one.
Step #1
Measure and cut the fabric according to your size preferences. Children may like smaller sizes, and you could cut sizes and shapes that they desire.
Step #2
After you have cut the fabric, fold it into half lengthwise. Here, keep the finished side of the fabric inside so that after the pillowcase is ready, the stitches are not visible on the exterior.
Step #3
Sew the longer side together with the help of a matching thread, either on a sewing machine or by hand. A sewing machine is suggested as the stitches are highly efficient (and could bear more pillow fights).
Step #4
Now, stitch one of the short ends in a similar way. So you now have a pillowcase with three sides closed. This leaves only one side open, which is of course for the pillow to go in.
Step #5
Turn the pillowcase inside out so that the finished end is now visible. You would have to hem the open ends by folding half an inch of the fabric towards the inner side. This is where an iron comes into picture. After you have folded the ends, place a hot iron on it so that it becomes easy for you to hem these using the zigzag or serge pattern. Place a pillow inside and see whether it fits in properly.


4 Comments on this Post
vurtilopmer
As I site possessor I believe the content material here is rattling magnificent , appreciate it for your efforts. You should keep it up forever! Best of luck.
How to play slots for money
Excellent blog here! Also your web site loads up very fast! What host are you using? Can I get your affiliate link to your host? I wish my web site loaded up as fast as yours lol
zortilonrel
As a Newbie, I am always exploring online for articles that can benefit me. Thank you
zortilo nrel
A lot of of whatever you assert is supprisingly precise and that makes me ponder why I had not looked at this in this light before. Your piece truly did turn the light on for me personally as far as this particular subject matter goes. Nonetheless there is actually just one point I am not necessarily too comfy with and whilst I make an effort to reconcile that with the core theme of your point, permit me see what the rest of the visitors have to say.Well done.